Exchange & Wallet Guide
How to create an account
Before you start, you will need to decide on which blockchain you want to issue your NFTs. Ethereum is currently the leading blockchain service for NFT issuance. However, there is a range of other blockchains that are becoming increasingly popular, including: Binance Smart Chain, Flow by Dapper Labs, Tron, EOS, Polkadot, Tezos, Cosmos and WAX. Each blockchain has its own separate NFT token standard, compatible wallet services and marketplaces. Since Ethereum has the largest NFT ecosystem, here’s what you’ll need to mint your own NFT artwork, music or video on the Ethereum blockchain:
- An Ethereum wallet that supports ERC-721 (the Ethereum-based NFT token standard), such as MetaMask, Trust Wallet or Coinbase Wallet.
- Around $50-$100 in ether (ETH). If you are using Coinbase’s wallet you can buy ether from the platform with U.S. dollars, British pound sterling and other fiat currencies.
Once you have these, there are a number of NFT-centric platforms that allow you to connect your wallet and upload your chosen image or file that you want to turn into an NFT. The main Ethereum NFT marketplaces include
- OpenSea
- Rarible
- Mintable.
Makersplace also allows you to create your own NFTs but you have to register to become a listed artist on the platform beforehand.
OpenSea
Here’s how the process works on OpenSea, currently the largest Ethereum-based NFT marketplace.
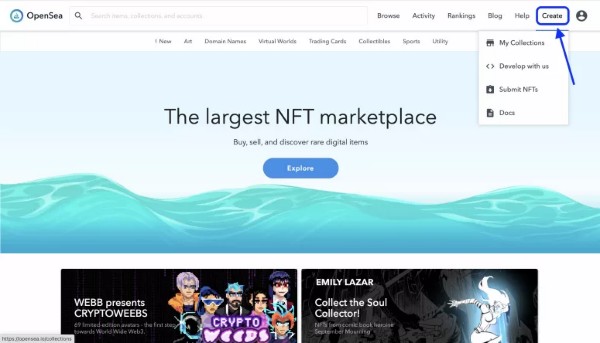
Clicking the “create” button (blue) will take you to a screen that asks you to connect your Ethereum-based wallet. Once you’ve entered your wallet password when requested it will automatically connect your wallet with the marketplace. You may have to digitally sign a message in your Ethereum wallet to prove you own the wallet address, but it’s just a case of clicking through to proceed.
Digitally signing a message does not incur a fee, it’s just to show that you have ownership over the wallet.
The next step on OpenSea is to hover over “create” in the top right corner and select “my collections.” From there, click the blue “create” button as shown below.
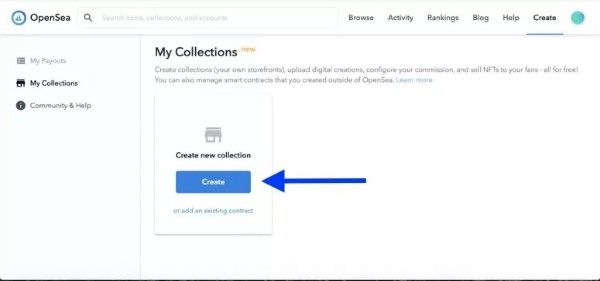
A window will appear that allows you to upload your artwork, add a name and include a description.
This part is essentially just you creating a folder for your newly created NFTs to go in.

Once you’ve assigned an image for your collection, it will appear as shown below (blue). You’ll then need to add a banner image to the page by clicking on the pencil icon in the top right corner (red).

Your page should end up looking something like the image below.
Now, you’re ready to create your first NFT. Click on the “Add New Item” button (blue) and sign another message using your wallet.

You’ll arrive at a new window where you can upload your NFT image, audio, GIF or 3D model.
On OpenSea and many other marketplaces, you also have the option to include special traits and attributes to increase the scarcity and uniqueness of your NFT. Creators even have the opportunity to include unlockable content that can only be viewed by the purchaser. This can be anything from passwords to access certain services to discount codes and contact information.

Once you’re finished, click “create” at the bottom and sign another message in your wallet to confirm the creation of the NFT. The artwork should then appear in your collection.
Rarible
To open a Rarible account, you need to connect a compatible crypto wallet. Once connected, Rarible will auto-generate an account, which can be immediately used to access the marketplace.
To personalise your account profile, head to ‘My Account’. From there, you can set up a display name and profile picture, edit your account bio and custom URL. Then, confirm changes by clicking ‘Update Profile’.
You may wish to have a verified badge associated with your account. Rarible stresses that verified badges are only awarded to creators and collectors that can prove authenticity and dedication to the marketplace. Users will have to fill out a Typeform found in the website’s FAQs.
Mintable
Mintable allows an array of different file types and it’s as easy as a few clicks with their extremely user friendly interface to convert your files into NFTs. To start creating your very own NFT , you need to get your media in order. NFTs can support an array of files, like visual files (JPG, PNG, GIF, etc.), music files (MP3, etc.), 3D files (GLB, etc.).
Below is the step by step guide to opening an account with Mintable;
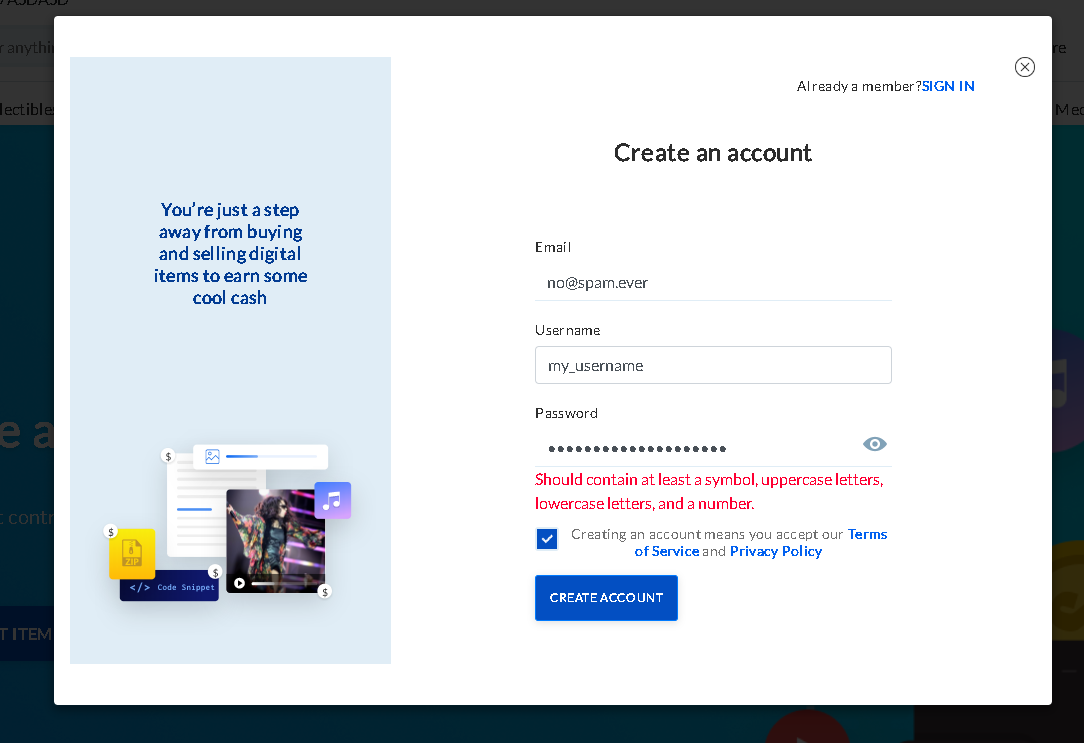
Step 1: click “create account” in the top right of the Mintable website
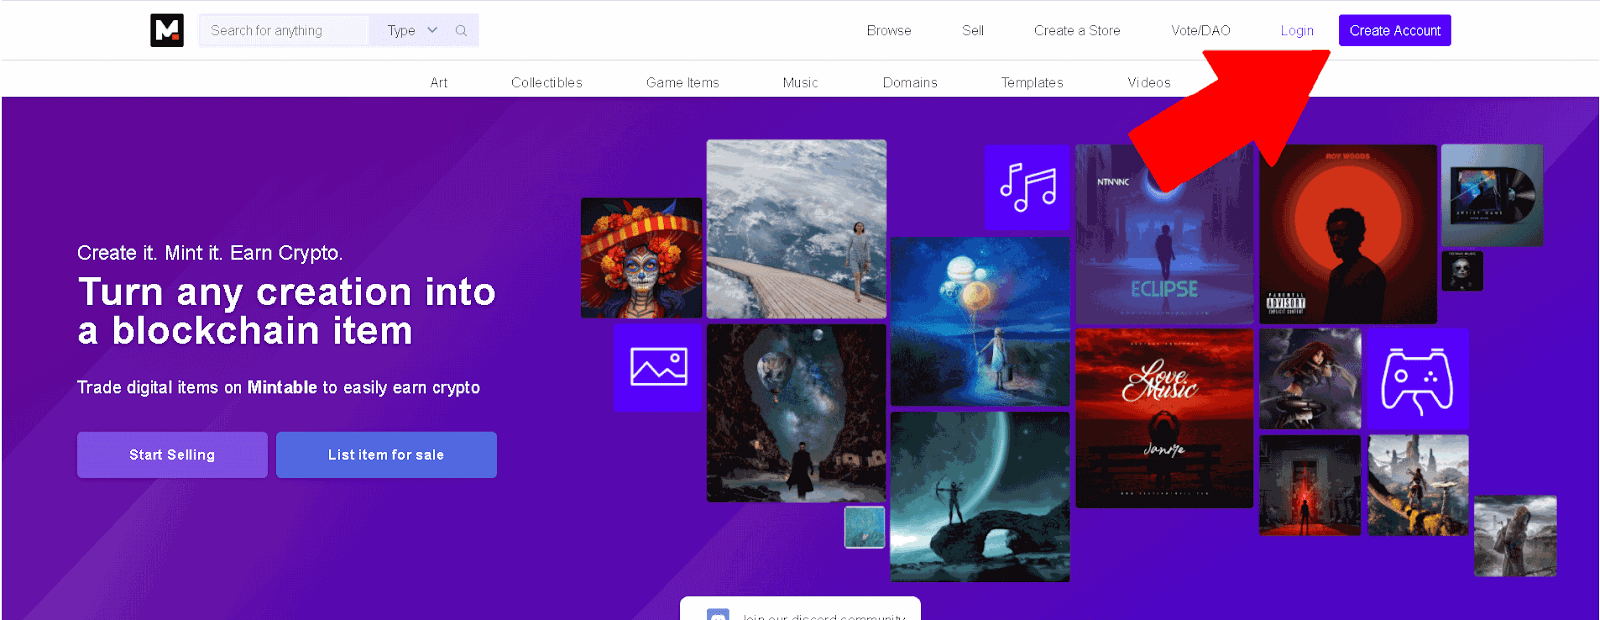
Step 2: Enter your email , desired username and password. Make sure your password follows the requirements and it’s a strong password.
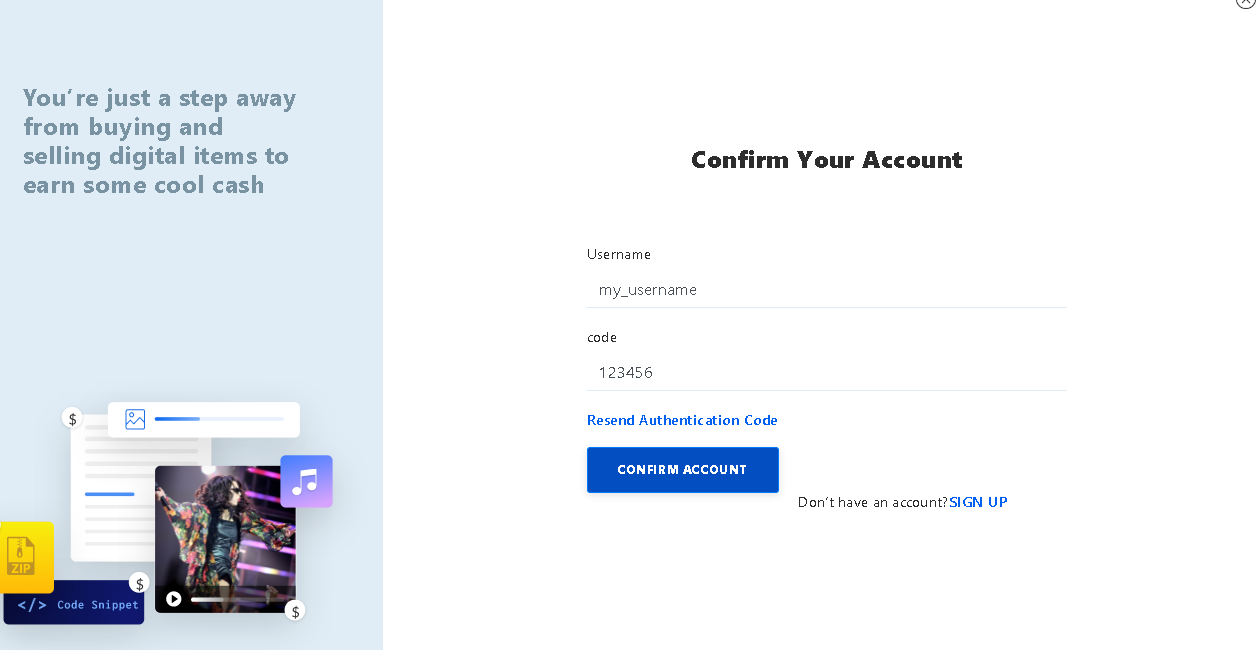
Step 3: Check your email for the code (make sure you check spam if you don’t see it almost immediately)
You can choose to pay gas fees or mint the NFT for free. You then need to connect your MetaMask Web3 Wallet. Once your wallet is connected you can then Create and List items for sale.
How to connect your wallet
Once you have completed the above steps, there are a number of NFT-centric platforms that allow you to connect your wallet and upload your chosen image or file that you want to turn into an NFT.
The main Ethereum NFT marketplaces include: OpenSea, Rarible and Mintable. Makersplace also allows you to create your own NFTs but you have to register to become a listed artist on the platform beforehand. OpenSea, Rarible and Mintable all have a “create” button in the top right corner. By clicking the “create” button (blue) will take you to a screen that asks you to connect your Ethereum-based wallet. Once you’ve entered your wallet password when requested it will automatically connect your wallet with the marketplace.
You may have to digitally sign a message in your Ethereum wallet to prove you own the wallet address, but it’s just a case of clicking through to proceed. Digitally signing a message does not incur a fee, it’s just to show that you have ownership over the wallet.
How to Use Metamask
MetaMask is an open-source Ethereum wallet that supports all kinds of Ethereum-based tokens (such as those following the ERC-20 standard, or non-fungible tokens) but also a web browser extension. On top of that, you can receive them from others, or purchase/swap them with the built-in Coinbase and ShapeShift integrations.What makes MetaMask so interesting is that it can interface with websites. With other wallets, you’d need to copy-paste payment addresses or scan a QR code on a separate device. With the MetaMask extension, the website simply pings your wallet, and you’re prompted to accept or reject the transaction.
MetaMask can serve as a regular crypto wallet, but its real strength is in seamlessly interfacing with smart contracts and decentralized applications. The MetaMask wallet can be installed on Google Chrome, Firefox, or the Brave Browser. It’s also available on iOS and Android.
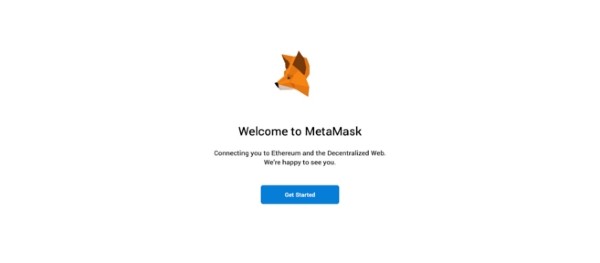
Click on Get Started. This is where you’ll be prompted to either import a seed phrase or create a new one. Click on Create a Wallet. Create a password. If you’re one of those legendary creatures that actually reads the user agreement for your software, you can view it by clicking on Terms of Use. Otherwise, come up with a strong password, tick the box, and click Create.
MetaMask is a non-custodial service, meaning that no one else can access your funds – not even the MetaMask developers. It is crucial that you write down your backup phrase. This is the only way you can restore your account should something unfortunate happen.

You can also connect a hardware wallet (Trezor and Ledger are both supported), create a contact list, and, of course, receive and send funds as you would in a normal wallet.
The usual security principles apply: MetaMask is a hot wallet, meaning that it runs on an internet-connected device. This exposes you to more risk than a cold wallet, which is kept offline to reduce attack vectors.Lastly, when using MetaMask, it stands to reason that you should be conscious of what websites you’re granting access to.
How to Use Metamask with Ledger
Metamask allows you to connect a hardware wallet like the Ledger wallet, this allows you to check your account balance (ETH or Tokens), sign transactions (for example send ETH and ERC20 tokens and collectibles, deploy contracts, etc.) as well as sign messages.
Why connect your hardware wallet to MetMask? Some sites may have integration with MetaMask but not with Trezor or Ledger wallets yet. Connecting your wallet with MetaMask, allows you to interact with those sites now. In addition, this helps developers, as it gives their users more options with less development work on their end.
Here is a simple guide on how to use Metamask with Ledger wallet:
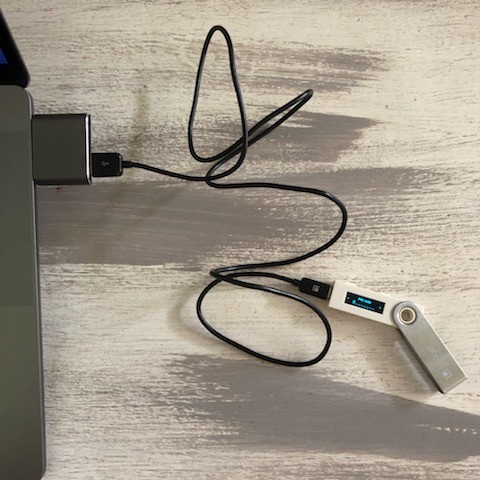
Step 1; Unlock your Metamask & connect Ledger to your computer
Your first step is to plug your Ledger into your computer. Ensure it powers on and then input the pin you choose when setting up your Ledger.
Step 2: Select the Ethereum application
you need to open the Ethereum application on your Ledger Nano. You do this by switching through the applications installed on your Ledger by pressing down on either the left or right button to navigate through the applications.Once you have the Ethereum application selected, push down on both buttons to open the application.

Step 3: Make sure that contract data is turned on
Once the Ethereum application is open, press the right side button until you locate the “Settings” option. Press down on both buttons to open the menu. The first item in the settings menu is “Contract Data”. Push down both buttons to select it.
Now navigate with the right side button to choose “Yes” and then press down on both buttons to select it.
Once you have set your ledger up like this the first time, you won’t have to do it again each time you want to use it with MetaMask.
Your Ledger is now ready!
Step 4: Open MetaMask
Since you have already installed MetaMask, you need to open up your browser, and click on the MetaMask fox to interact with the application. Next, you need to click on your avatar in the top right corner of MetaMask. The avatar on your version of MetaMask will look different to the one in the image, but is always located in the same place.
This will open up the menu in black and will give you access to many options for customizing your MetaMask such as adding additional accounts, importing accounts and connecting a hardware wallet such as your Ledger Nano.
Step 5: Connect MetaMask to your Ledger
Click on “Connect Hardware Wallet”. The next screen that pops up is fairly self explanatory. Simply click on the “Ledger” button to select it, and then click “CONNECT”.
Next you will be shown a list of ETH addresses. If this is the first time you set up a wallet, simply select the first address.
If you already have an ETH address that you would like to connect to MetaMask, and you have an ETH balance, then select that one from the list. MetaMask automatically sorts the addresses on your Ledger by balance, so if you have an Ethereum balance in the same address, this is the easiest way to identify your account.
Once you have found the correct address (in this case, in the pink box), click “CONNECT”.
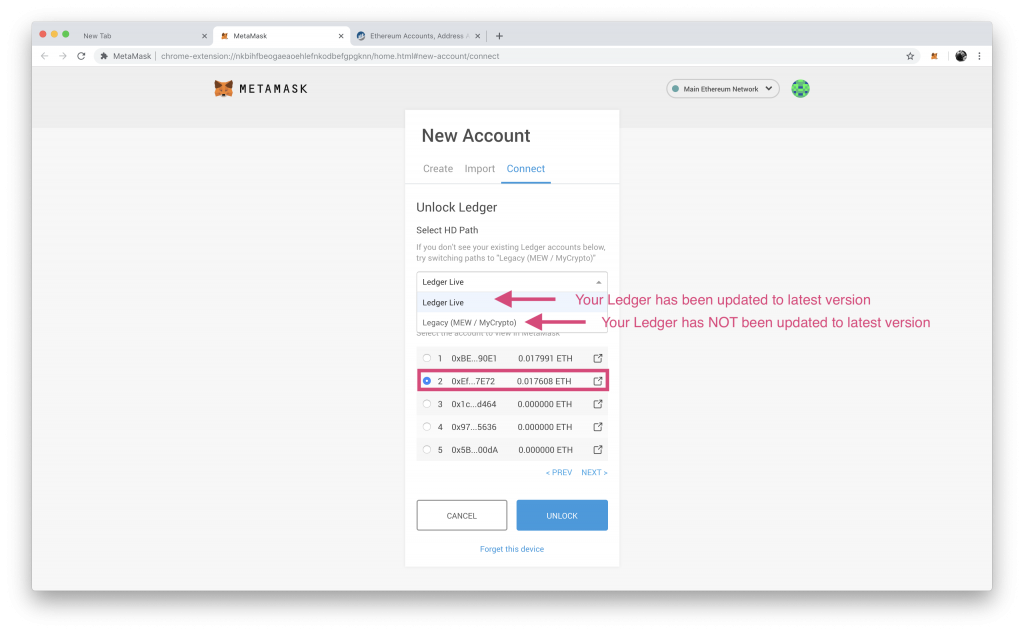
You are done, you have now connected your Ledger to MetaMask!

Once you successfully connect your account, it will behave just like other MetaMask accounts, with the difference that you need to have your wallet plugged in for signing transactions or messages.
If later you want to remove the connected account, simply click the X next to it on the account list menu (MetaMask will remember your account name and tx history if you reimport that account in the future).
How to Use Fortmatic
Fortmatic is an easy-to-use alternative to web3 wallets like Metamask. It allows users to use a phone number or email address to connect to Ethereum-based applications, all without the need for a browser extension. Fortmatic’s SDK allows for easy integration into existing applications, simply by copying and pasting a few lines of code.
Fortmatic uses hardware security module (HSM) cryptographic anchors, a security mechanism which is used by many of the industries top custodial solutions. With this, hackers must attempt to crack encrypted keys within the organisation’s infrastructure; meaning their progress can be detected and obstructed, significantly reducing the potential for losses.
To begin with Fortmatic, simply open a Fortmatic-enabled dApp. For this example, we’ll use the decentralized exchange Airswap, as demonstrated below:
Click “Connect Wallet” to get started.

All of the compatible wallet options will be presented. Click on Fortmatic. From here, set up Fortmatic wallet. Click “Continue”.

Simply enter an email address, or click “Use Phone Instead” to use a mobile number.
A verification code will be sent to the provided email address or phone number. To finish, simply select a password to secure the new account.
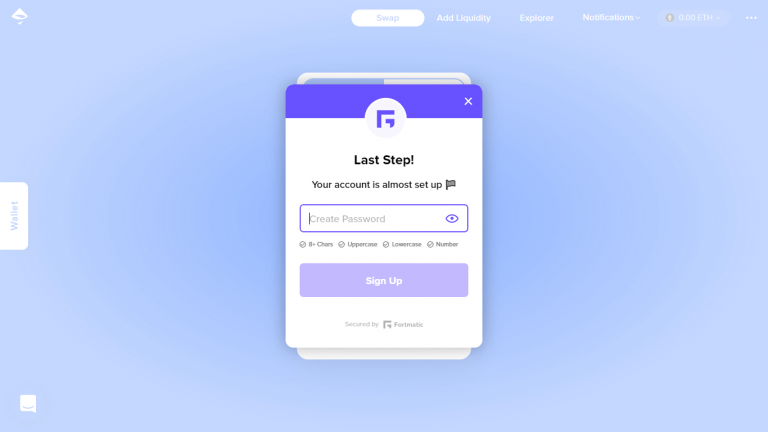
That’s it! Now, you can interact with supported Ethereum applications simply by entering the chosen email address or phone number and password – no apps or extensions needed.
Mintable (Zilliqa Support)
Offering particular utility for enterprises and large-scale, complex computation, Zilliqa is a blockchain network with high levels of scalability due to its early implementation of sharding technology. Sharding allows a blockchain network to be separated into sub-networks, where certain computations can be run in parallel. Zilliqa also has its own programming language called Scilla, which is designed for security, scalability, and smart contract functionality.
Zilliqa is a blockchain for computationally intensive use cases for enterprise and emerging tech. Key to its functionality is its implementation of sharding. Sharding is a type of DataBase partitioning in which a large DataBase is divided or partitioned into smaller data, also known as shards.
Mintable launched a user-friendly digital marketplace platform to buy, sell and trade assets on the Ziliiqa blockchain. Powered by secure-by-design smart contracts, buyers can easily verify the authenticity of their artworks and collectibles. With the option to pay for items via ZilPay, and get possession of the chosen items immediately.
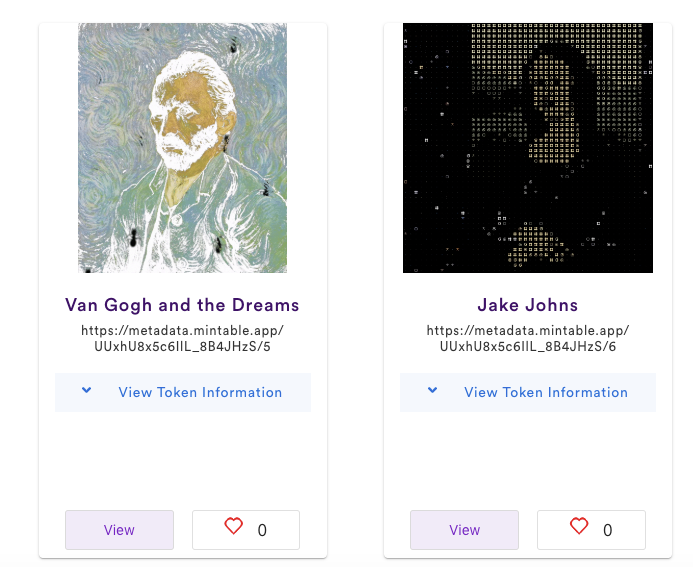
Examples of some digital art for sale on Mintable.
Recognising the increasing demand for user-friendly interfaces on the blockchain, Mintable also lists .zil domain names on their app.